

Can you believe it?...
I'm finally getting around
to doing a tutorial on my
apron water bottle/soda covers.
I have had sooo many requests
for this tutorial ever since
I started my blog...
today it feels good
to finally be doing it:)
I can't tell you how many of
these little cuties
that I've sewn over the years...
well into the hundreds I'm sure.
I first posted about them
a long time ago...
if you are new to my blog...
you can read all about them
by clicking
For my aprons today...
I chose to use two cute
japanese fabrics from my stash.

It just takes
1 - 6" square of fabric
for one apron...
and 2 - 1 1/2"x 3 1/2"
for the pockets.
But I usually make more
than one at a time...
and today I am making 4!
If you want to make them with me...
All you will need to make 4 aprons are...
2 - 10" squares of fabric that coordinate
4 yards of 1/4" bias tape (double fold)
Thread to match bias tape.
I think this is a great way to
use up leftover 10" squares:)

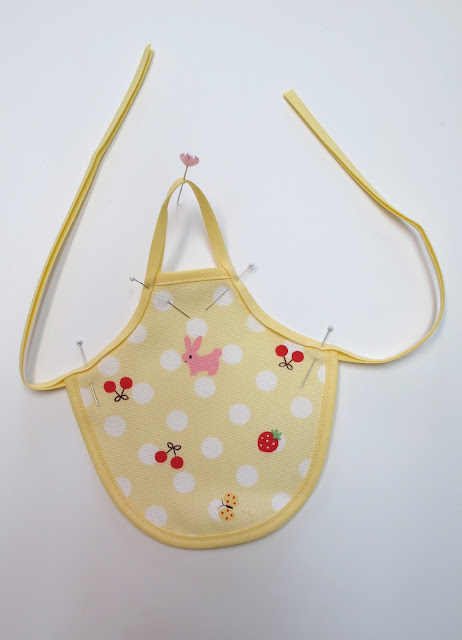
I like to trace my aprons and pockets
onto freezer paper and iron them
onto the fabric so that
I don't need to use pins.
I think sometimes the pins can
distort small fabric pieces
and this way I can get a
more accurate cut.

Cut 2 aprons and 4 pockets
out of one square and peel off
the freezer paper...

Iron the freezer paper patterns
onto the other square and
cut out two more aprons
and 4 more pockets.

Each apron uses one yard of bias tape.

Now you're ready to roll!
Using one yard of the bias tape...
cut a 2" long piece...
a 10" long piece...
and fold the remaining in half and
place a pin in the center.


a 10" long piece...
and fold the remaining in half and
place a pin in the center.

*NOTE - When sewing with double folded
bias tape, use matching thread an
remember that the shorter side of
the fold always goes on the top.
Step 1:
Fold the 2" piece over the top of the apron. You won't need to pin...
just go ahead and top stitch into place
about 1/8" from the edge of the bias tape.
No backstitching needed at this point.
Step 2:
Fold the 10" piece of bias tape around the bottom curved edge of the apron.
Topstitch into place.
Again, do not add bulk by backstitching.

Trim the ends of the bias tape even with the edges of the apron.

Step 3:
Pin the remaining piece of bias tape
onto the top side and bottom side corners
of apron...folding it around the
inside curves when pinning.
Leave a loop long enough at the top
for the neck of the apron.
(refer to the download pattern to see
how big to make the loop)
Now go ahead and topstitch the bias tape together starting at the end of the
left apron tie and continue stitching.
When you reach each pin...remove it and continue stitching the bias tape to the inside curves of the apron...continue on stitching the neck...then the next inside curve and on until you reach the end of the right apron tie.
Don't forget to backstitch at the beginning
and end of each tie.

Finished apron without pockets:)

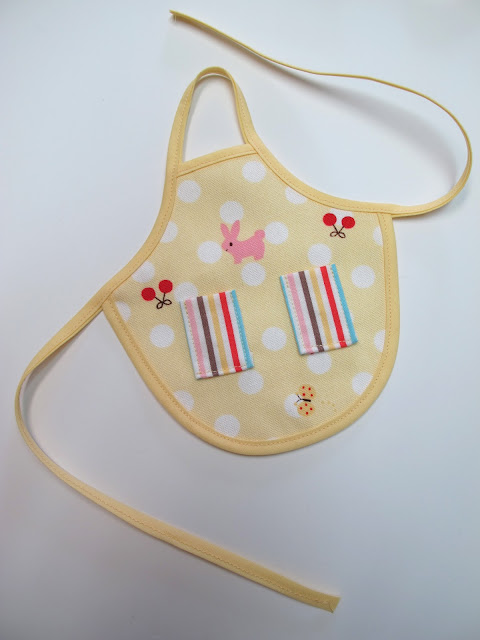
Now for the pockets...
Press each pocket in half with
right sides together.
It should now measure 1 1/2" x 1 3/4".
Press about 1/4" under the 3 raw edges
leaving the folded edge for the
top of the pocket.

Pin the pockets onto the apron front
and topstitch into place...leaving the top folded edge of pocket unstitched.

Use your stylus or small pointy scissors
to keep the seam allowances turned under
while stitching.
Don't forget to backstitch!

Completed apron with pockets:)
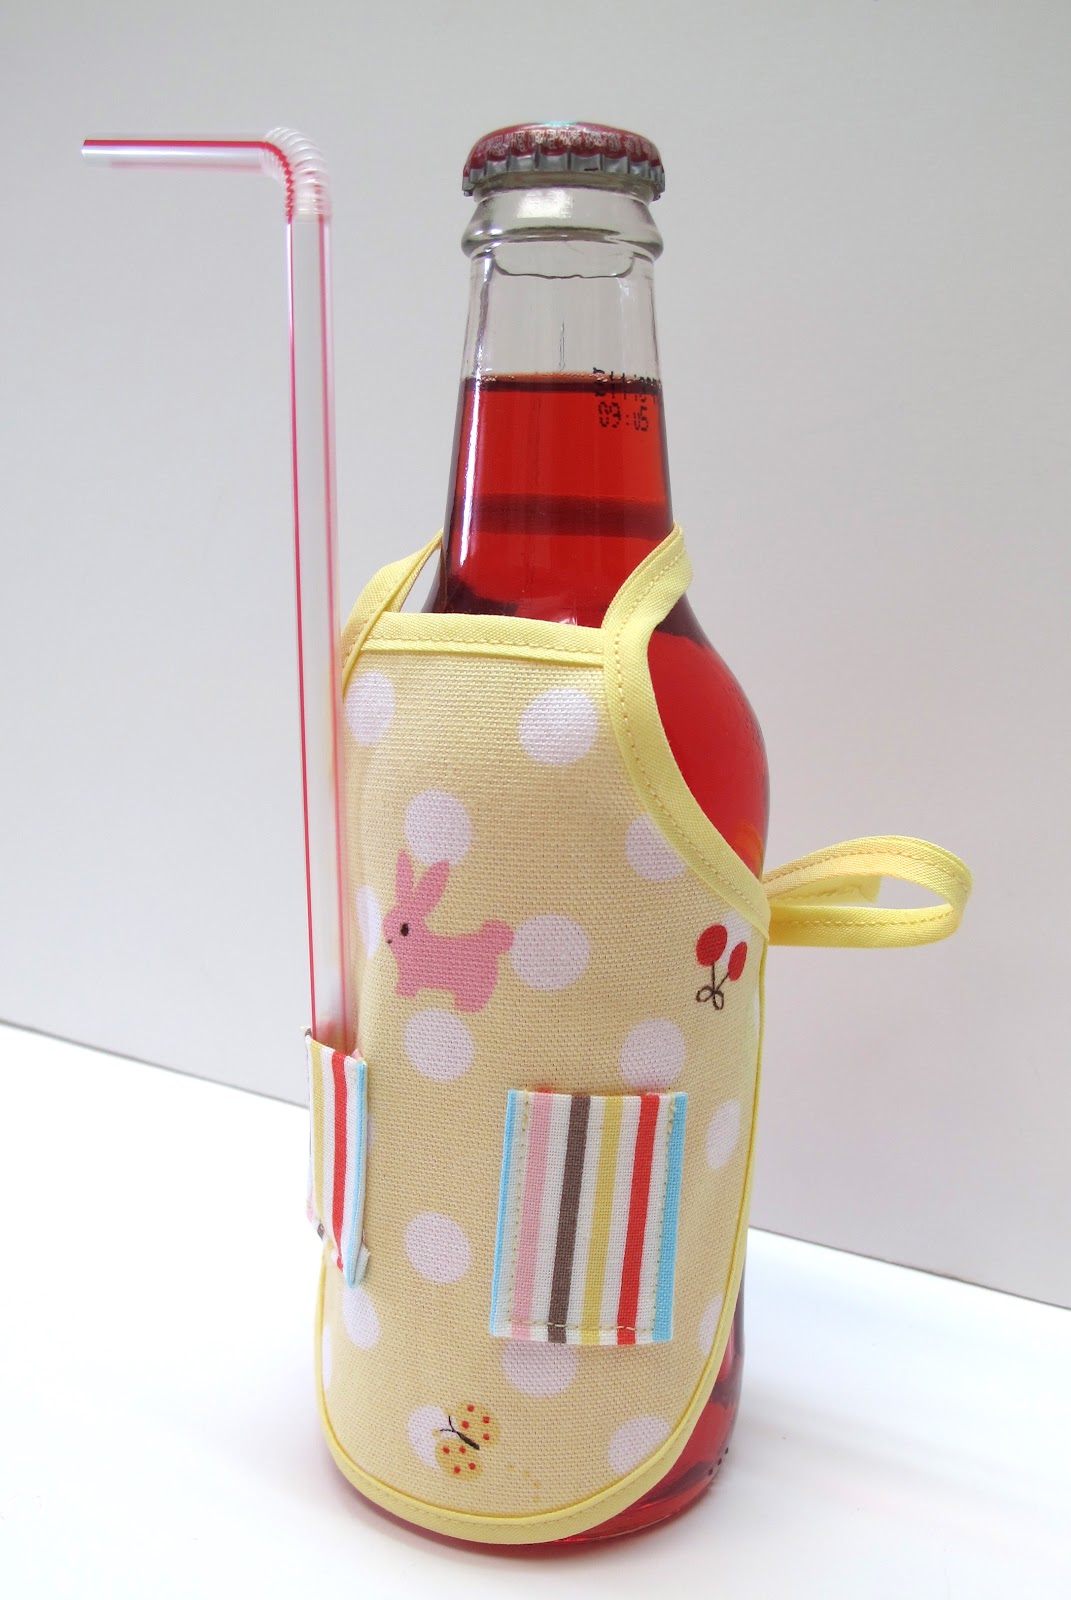
Now tie it on your soda or water bottle and place a straw in one of the pockets!

In the other pocket you could put a love note...or a cute little candy...or their name for a place setting:)
I have done that for a luncheons.

You could make the pockets a little larger to hold what you want...I've done that too!

Or you can fussy cut the fabric
so that the pockets match
like I did with the cherries:)

This Coca Cola bottle looked
a little bit naked to me...

So I made her an apron using my
Sew Cherry fabric.


And 3 makes a party!!!
I hope you enjoyed my tutorial and
that you have fun making a few aprons
for yourself and your
apron lovin' friends:)
xx
Lori

11 comments:
Thank you for the pattern and tutorial. Unfortunatly, I don't have a facebook account so I am unable to download the pattern. I think I can figure it out from all the great photos!
Thanks again,
Deb
Love it. Great tutorial!
Love it! Great tutorial.
What a darling idea and a great tutorial! Is there anyway to obtain the pattern without having a facebook account?
These could NOT be cuter! Good seamstressing :) Love the fat quarters in the above post, too. Got me some from Cath Kidston this past week. btw, I'm visiting via Vintage Thingie Thursday~
love all the pink and grey very pretty and charming
Too cute...love it! So many possibilities! Thanks for the tut, nice pics~ Fun blog. :)
Love the aprons Lori!
I featured this post on my Misc. Finds Monday post :)
You can see it here:
http://collettaskitchensink.blogspot.com/2012/04/misc-finds-monday-4212.html
Colletta
It's a original work
A hug
Anna
My mother had these in the 50s....glad to see them back!!!
Post a Comment